Desserts

Fall = Oranges & Chocolate

My friends from Salazon Chocolate Co. asked me to write a recipe for them. When I said YES (notice the caps) they sent me some chocolate.

I said yes because I really love chocolate and I’m a sucker for a new brand. So, while walking through Whole Foods Market their bars caught my eye.

It’s marketed to the outdoors person such as a hiker or backpacker; someone who needs a little extra energy after a long journey. There are several to choose from like 72% Organic Dark Chocolate with Sea Salt & Organic Cayenne and the one I’m using for this recipe:

Organic Dark Chocolate with Sea Salt & Organic Turbinado Cane Sugar. 

This recipe is one that I’ve been using for years. One which came out of my love for Spain and tapas. It combines traditional Spanish flavors and makes for a light snack or dessert after a Fall meal.

Here’s the recipe:

Ingredients

1 large orange, seedless
1 Tbls of cinnamon
1 bar, Salazon Chocolate (Dark Chocolate w/Sea Salt & Organic Turbinado Cane Sugar) 

Process

Slice orange in half between stem & bottom. 
Slice each half. You now have 4 quarters.
Slice each quarter into ¼- ½” slices.
Arrange orange slices on a platter. Sprinkle cinnamon down the center of each orange slice. Break off pieces of the chocolate bar. Serve immediately.

Yields up to 4 servings; 2 oranges slices per person & several pieces of chocolate.

Superbowl Oatmeal Chocolate Chip Cookies

In my senior year of high school I got this wild baking idea: I would make chocolate chip cookies for the varsity football team during their playing season.

Every Thursday evening after our family’s supper I would gather all my ingredients in preparation for an evening of baking.  Then I’d painstakingly cream butter and sugar together, add the eggs and vanilla, sift dry ingredients then combine all these ingredients together - by hand.  Gently I would drop spoonfuls of dough onto baking sheets and spend what seemed like hours baking.  After they came out of the oven I would set them on racks to cool. Then I would count them out by the dozen placing them in perfectly even rows.  

Not one family member was to touch them until I knew the end count.  

Finally, I would  dole them out into bags.  When Friday morning arrived I’d proudly take those bags to school and hand them out to “my” team.  

My well intentioned weekly project got the better of me when finally after several games one of the guys came up to me and said, “Beth, we love you and the cookies you make for us but we can’t eat them before or after the game because it might make us sick.”

So, with a bittersweet memory and the craving for sugar and chocolate I give you a fail safe recipe for the best Super Bowl Oatmeal Chocolate Chip Cookie.

Here’s to the end of football season but not my cookie making pleasure! 

Ingredients

1 stick + 6 Tbls of unsalted butter, soften to room temperature
3/4 C Turbinado or Raw Cane sugar
1/2 C granulated sugar
3 large eggs - whole
1/2 tsp vanilla
1 1/2 C all purpose flour
1 tsp baking powder
1/2 tsp cinnamon powder
1/2 tsp ginger powder
3/4 tsp kosher salt
3 C old fashioned oats
2 C chocolate chips

Process

Pre-heat oven 350F

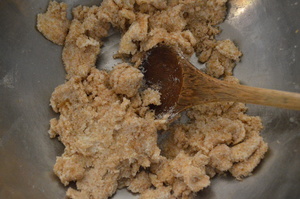
Cream butter and sugar together in a large bowl.

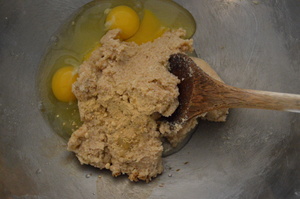
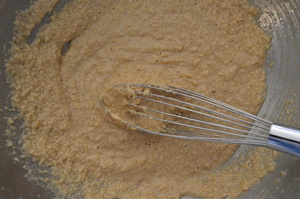
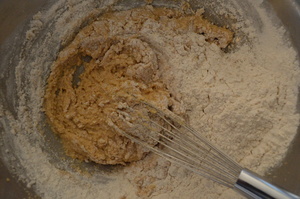
Add eggs, vanilla and stir to incorporate all ingredients. It does not have to be perfectly smooth. However, I used a whisk which helps break up the bigger pieces of butter and or sugar.

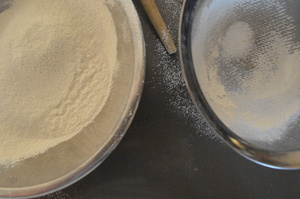
In a separate bowl sift together flour, baking powder, cinnamon, ginger and salt. Then gently add into liquid mixture and stir to combine.

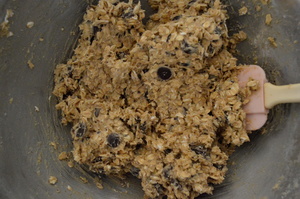
With a spatula scrape the inside of the bowl to incorporate all the flour mixture into the liquid. Once thoroughly mixed add your old fashioned oats and chocolate.  Fold all ingredients into the other.

Using a 2” wide ice-cream scoop, fill it with dough and level the top off.  Place measured dough onto a parchment papered half baking sheet; 2 rows of 3.

Place into the preheated oven, center of the middle shelf and bake for 12 minutes.  Open oven, rotate sheet once (back to front), close oven and bake for 5 minutes.  Take cookies out of oven, set aside to cool.  Repeat until the cookie dough is gone.

Eat with abandon! 

Yields 21 - 3 1/4” cookies.

Tips

*I used 60% cocoa bittersweet chocolate.  It lends a more distinctive intense chocolate flavor to the cookie itself.

*Since these chocolate chips were larger I did a quick chop to make them go further.

*Notice (see pictures above) how I used 3 different tools to mix; wooden spoon, whisk and spatula.  I DID make this batch of cookies by hand and I wanted to show you the progression of mixing tools which was contigent on how I had to mix and what would work best as the mixture progressed.  Obviously you can use a standing mixer like a KitchenAid. It does make life easier.

* I took some major liberties by adding & exchanging some ingredients.  And you can too! I did follow the basic oatmeal cookie recipe you’ll find on the inside top of the Quaker Oats Oatmeal container.  

Guest Post: Baby Babas — A Polish Dessert

Just a few weeks ago I received an e-mail from a dear friends daughter, Natalie.  Natalie asked if she could submit a blog post that she and two friends, Lydia and Savannah,  had been whipping up in the kitchen. How could I refuse my first request for a recipe submission? And, oh, what a recipe it is.

It is a dessert that they are calling “baby babas”.   So, in their own words and with their own pictures, I’m super proud to share this scrumptious looking dessert with you.  I’m off to bake it myself!   

Many thanks Natalie, Lydia and Savanna!

 Here is how to make a Polish dessert known as babeczki smietankowe (ba­BECH­kee shmye­tan­KO­veh)! We prefer to call them baby babas.

First, gather your ingredients. 

For the dough: 

4 sticks butter 
2 3/4 cups all­purpose flour   
2/3 cup confectioners’ (powdered) sugar 
4 large egg yolks 
1 tsp vanilla 


For the custard:

2 large eggs  
2 large egg yolks 
2/3 cup granulated sugar 
1 tsp vanilla 
2 tbsp cornstarch 
2 cups half­ and­ half, hot 

Next, gather supplies: cooking spray, muffin tin, stand ­mixer bowl, plastic wrap, measuring cups, measuring spoons, wooden spoon, whisk, rolling pin and timer. 

Attach bowl and paddle attachment to stand­mixer. Make sure the bowl is fully clicked in.

Process

Cut in butter and flour until coarse crumbs form.  Add sugar, egg yolks, and vanilla until thoroughly mixed.

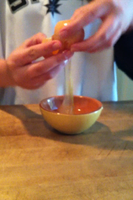
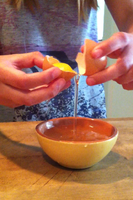
To separate the yolks, crack the egg, but leave the yolk in half of the shell. Transfer the yolk to the other half, emptying out the whites as you go.

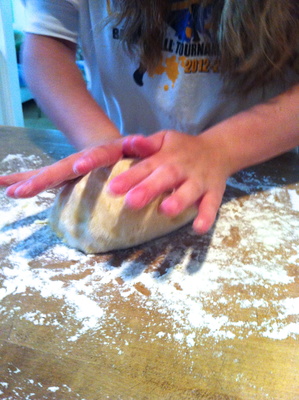
Knead dough on cutting board, squashing any air pockets. This dough is very sticky, so use lots of flour!

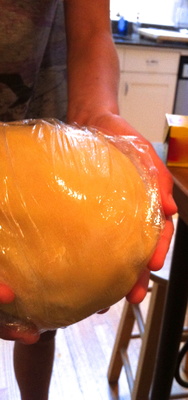
Wrap dough in plastic wrap, and place in fridge for 10 minutes or so. This prevents the dough from being too sticky when you cut it later.

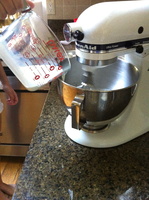
Beat eggs, egg yolks, and sugar for 5 minutes. Add vanilla and cornstarch. Beat more. Continue beating while adding the hot half­and­half. To heat up the half­and­half, pour into glass measuring cup designed for liquids.


Pour mixture in a non-reactive bowl and place in microwave for 2 1/2 to 3 minutes on medium high heat. Take out of microwave and pour into a medium size sauce pan (with high sides).

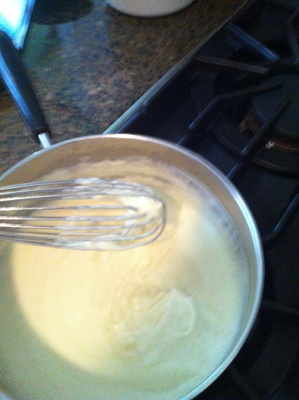
Cook mixture on low heat, stirring constantly until thick. Be sure you whisk at a high speed. Cool custard in refrigerator until completely cool.

Preheat oven to 400 degrees. Roll out dough to 1/4 inch thickness.

Grease muffin tin. Cut circles large enough to line standard muffin tin. We just used a plastic cup to do that. Once circle is placed into tin, fill 1/3 full with custard.

Cover each filled circle with another another smaller circle of dough and crimp edges. To crimp, pinch top and bottom edges together.


Bake for 15 to ­20 minutes, or until golden brown. Let the baby babas sit and cool completely before removing them from the tin. Otherwise, the babas will fall apart. 

We recommend serving the baby babas after they have been in the fridge for a few hours. The custard tastes much better when cold.

Pie Made Easy: A Peach & Blueberry Galette

Peaches and blueberries!  It’s summertime here in Texas and the peaches are divine. (thank you springtime rains).  So what do you do with those little peaches?  First, take a short trip to the hill country and buy as many as you can from the local farm stand.  Then, grab one of those softly fuzzy little orbs, put it up to your mouth and BITE down.  Experience the warm lush sweet nectar of the peach. And don’t be surprised if it’s juices run down your chin and into your hand. It’s just the best!  With sticky hands, drive yourself to the market and pick up some blueberries and citrus; then get yourself home.  Take out a few of your pantry staples (see below) and prepare yourself to bake one of the most fantastic rustic pies you’ve ever had!  Ok, I’m getting a little bossy but I just can’t help myself.

This recipe is one of my absolute favorites.  It couldn’t be easier and it’s the perfect dessert for your summertime entertaining.  Enjoy!

Ingredients

2 medium peaches, rinsed, pitted and cut into 1” pieces
½ pint of blueberries, rinsed & dried (gently)
½ Tbls of turbinado sugar
½ Tbls of all-purpose flour, + ½ tsp
½ tsp of salt
½ tsp of ground ginger
½ tsp of ground cinnamon
2 tsp of fresh lemon or orange juice
Zest of 1 medium lemon or 1 small orange
1 egg, whisked
Splash of water
1 Tbls of turbinado sugar
1 roll of Pillsbury pie dough

Process

Preheat oven 400°
Thaw one roll of Pillsbury dough.  Place parchment paper on a ½ sheet pan.  Sprinkle ½ tsp of flour in the center of the parchment paper (same circumference of the dough – as close as possible).  Roll dough out on the floured parchment paper.  Place in refrigerator to keep cool. 

Meanwhile, in a large non-reactive bowl, gently and thoroughly mix the peaches, blueberries, sugar, ½ tsp flour, salt, ginger, cinnamon, and lemon juice. The juices of the fruit will begin to macerate and the mixture will thicken.  Set this aside and remove the dough from the fridge.  Let the dough stand at room temperature until it is pliable. 

Take the fruit mixture and place it in the center of the dough; leaving a 1-2” lip around the circumference of the dough.  It will look like a pile of fruit.  Gently fold the edges of the dough over the pile of fruit (like you would a pie crust).  The dough will not meet in the center and you don’t want it to.  It should only encase the fruit as far as it can go.  You will have a medium circle of fruit showing.  Make sure the dough is folded securely. 

Combine egg and water in a small bowl.  With a pastry brush, gently brush egg wash over the entire dough portion of the galette.  Generously sprinkle sugar over the egg washed dough.  Place in the pre-heated oven for 20 to 30minutes or until the dough is golden and the fruit is bubbling.

Yields 6 servings

Tips
*It’s always great to make your own tart dough.  But let’s face it sometimes time is an issue.  Therefore, a store-bought dough is just fine.  I used Pillsbury because I think it is one of the best and most easily accessible doughs in the market.  It just works!